Art Nouveau Mural in Newton, MA

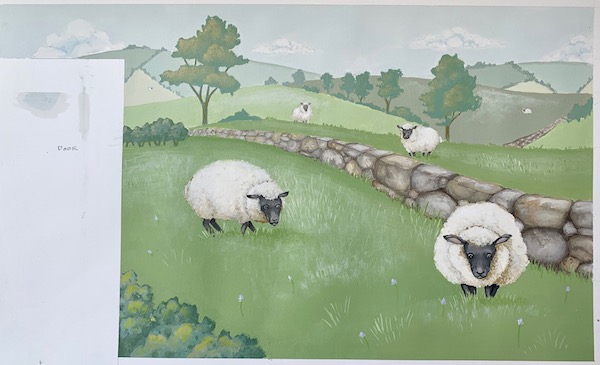
I love the challenge of bending my style to create murals for all kinds of spaces – which was definitely the case with this dining room mural in Newton!

Cathie main shot BLOG.jpg

My client Cathie was re-doing her dining room and wanted to do something different and dynamic with the wall treatments.  Collaborating with Cathie and her interior designers at Briar Design, we settled on letting the art nouveau details of the house (which was built around time art nouveau was flourishing) influence the design.  Cathie also likes chinoiserie designs, so that also played a role in our choices.

 Below are some shots of the room before we started (note the elaborate iron gate!)


Cathie before 1.jpg
Cathie before 2.jpg
Cathie before 3.jpg

We started by thinking about colors, and to keep with our theme and Cathie’s preferences, we landed on teals and blues.  Cathie also asked to incorporate gold (which was a perfect addition!).  For the subject matter, we decided to incorporate water birds as a nod to chinoiserie.

 With this direction in hand, I started to sketch out ideas and bounce them off of Anne and Jessica at Briar Design.  After some collaboration, we landed on using egrets, lily pads and lotus flowers.  I started my design concept with the organic, curling shapes in the iron gate and built off that.  Here is my first concept drawing that we presented to Cathie:

Cathie wall 1 design BLOG.jpg

Cathie loved the idea (!), so my next step was to take a section of this sketch and show Cathie what our final color selections would look like:


Cathie color concept BLOG.jpg

Cathie was happy with the final concept – so I was ALMOST on to the final mural.  Before I could do that, I had to design the other walls in the room.  Using measurements I took of the space, I did scale renditions for all of the walls:

Cathie wall 2 design BLOG.jpg
Cathie wall 3 design BLOG.jpg
Cathie wall 4 design BLOG.jpg

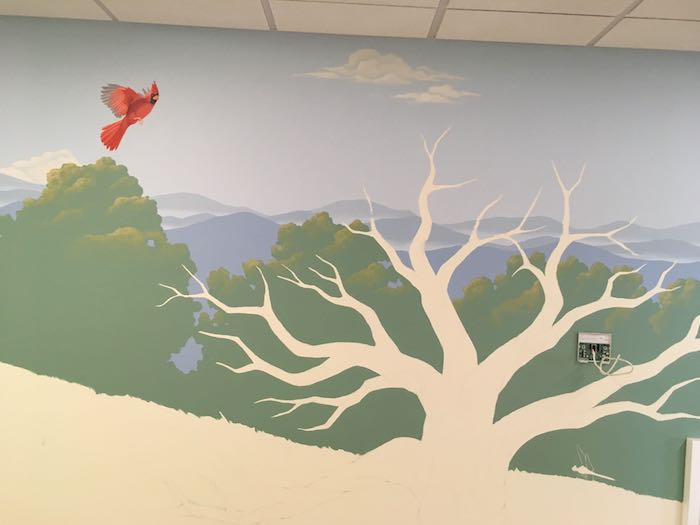
With this step done, NOW I was on to the final mural!  It was a blast to watch this mural unfold, and truly a pleasure to work with Cathie and her husband. Anne and her team are still working on next steps for the rest of the design (including sconces in the holes on one of the walls, new chandelier, etc) – but here are final pictures of the art nouveau walls!

Wall 1

Wall 1

Walls 1 and 2

Walls 1 and 2

Wall 2

Wall 2

Walls 2 and 3

Walls 2 and 3

Wall 3

Wall 3

Wall 4

Wall 4

And back around to the first wall with the corner of wall 4

And back around to the first wall with the corner of wall 4

Enjoy!

Jason

A Mural to Set the Mood at Local Tea House in Millis, MA

When I work with clients who want a mural painted, a couple of the common goals are to make their space special when people visit and memorable after they leave.  This was definitely the case with my most recent mural project for a tea house and café that is opening soon!

When my client Ed was planning the space for his up-coming Nirvana Tea House & Café in Millis, MA – he wanted it to have a little of the magic he experienced while visiting tea fields in Asia.  To accomplish this in a way that people would be sure to enjoy and remember, he asked me to make a centerpiece in his café with a 6’x13’ mural of a tea field!

When I met with Ed in the space, our first order of business was to figure out the mood and colors that would be the best fit for the mural.  For the mood, Ed wanted to capture the spiritual and inclusive nature of his motto “Inviting the world to tea”.  For the colors, Ed  already had a fantastic fabric from Bhutan picked out for the cushions on his seats, so we used that as our guide for colors in the rest of the café – and in turn the mural. 

To create a quiet, contemplative mood and to capture some of the beautiful jewel tones of purple, orange and yellow in the fabric, I decided to focus on a scene at sunset.  This set me on my way to finding images I could use as inspiration, which I shared with Ed to come up with a look that fit his vision.

Once I was confident I knew what Ed wanted, I moved on to my “concept painting” stage – where I do a scale painting of the mural design I am proposing with the actual paints I would use for the final project.  Below is an image of this concept painting:

8” x 18” concept painting

8” x 18” concept painting

We met again in the space to look at this concept together and Ed loved it! With my design approved, I was on to painting the final mural.  Below are various stages of the process – starting with the blank wall:


The blank wall pre-mural

The blank wall pre-mural

After 3 days of drawing and painting

After 3 days of drawing and painting

Action shot on day 4

Action shot on day 4

Action shot on day 5

Action shot on day 5

N blog 2.jpg
Action shot on day 6

Action shot on day 6

Day 7

Day 7

N blog 4.jpg
Day 8

Day 8

The foreground close-up of the tea plants took over 3 days to paint!

The foreground close-up of the tea plants took over 3 days to paint!

Done painting! I came back to do a protective clear-coat

Done painting! I came back to do a protective clear-coat

Foreground detail

Foreground detail

And here is the final result after Ed had the ceiling painted to match the darker purple trim in the café:

Nirvana final 2 blog.jpg

As another fun note on this project, Ed also had me create the logo for Nirvana!  Our main objectives with the logo were to make something that would capture the sprit of Ed’s tag line “Inviting the world to tea” and would also be identifiable and memorable.  After some brainstorming around different approaches, below is the final logo that will soon adorn Nirvana Tea House & Café!:

Nirvana logo and type blog.jpg

Enjoy!

Jason

Setting the Tone for Law Office Clients with a Mural

Why go through the effort and expense of having a mural painted in your office? For my clients at Next Phase Legal in Norfolk, MA, it was about beautifying their lobby while creating a lasting impression and setting a tone for their clients.

Indeed - in the week while I was painting it, I heard comments from clients visiting the firm that ranged from “beautiful” to “soothing”, “relaxing”, “mesmerizing” and “memorable”… Mission accomplished!

My client Steve first came to me with a quote from Seth Godin that is a perfect stage-setter for the dispute resolution work they do at Next Phase:

Peace might not mean getting everyone else to do what you want them to do. Instead, it might involve understanding that others don't always want what we want and don't often believe what we believe. Most of the time, people want to be seen, understood and appreciated. If we can offer someone dignity, we give them a gift that's difficult to find.”

Steve’s goal was to create something special and he knew he wanted more than just the quote painted on the wall – so we met to brainstorm ideas.  After bouncing around a few thoughts, we landed on the idea of incorporating an image of water together with the quote.  Steve and I share a passion for paddling, but we also liked the engaging and soothing qualities of water to complement Seth Godin’s words.

With this idea and the lobby colors in hand, I was off to paint a concept sketch. To accommodate designs with type, I take an image of my completed concept painting and combine it with type in PowerPoint to show what the final result with image and type will look like.  This also enables me to easily look at different fonts together with my clients without altering the concept painting. Below are the concept painting and the PPT.

The scale concept painting

The scale concept painting

Concept with type

Concept with type

Steve loved the painting and after looking at a few font options, we had a winner! 

When I paint the concept, I use actual wall paints and keep record of exactly what I use – so once the concept is approved I know exactly what I need to do on the wall!  For anyone familiar with my fine-art paintings, you already know how much I love painting water – so this was a fun mural to paint!! Below is the final mural

The final mural

The final mural

Enjoy!

Jason

Custom Paint Finish for a Guitar

It’s a rare that I can combine my passion for art and my love of music (and guitars!), so my latest project of creating a custom finish on an electric guitar was a special treat!

I started with a raw-wood guitar body cut in the shape of the iconic Fender Telecaster – a blank canvas with no direction other than to make it a one-of-a-kind guitar.

Fender has used many fantastic colors over the years, so I started by looking through some of the older “classic” colors from the 50’s, 60’s and 70’s.  While my goal was not to exactly match these colors, I found inspiration in colors like “Sherwood Green”, “Daphne Blue” and “Aged White”.  I also have always been partial to what is called a “Relic” finish – which is a new finish created to look like it has already seen years of use.  I love this “Relic” look largely because of my affection for one of my own instruments from 1979 that has a high level of real-use wear.

In addition to some of these tried and true ideas, I also wanted to add my own custom touch.  I didn’t want to add anything too large or detailed because I was concerned the overall look would get too busy with both a design and the relic treatment.  After playing with a few ideas, I landed on something near and dear to me – crows! At first, the crows were just black profiles (like on the ceilings of a few of my murals), but to better go with my color scheme, I used a dark grey in place of the black.   I then decided to add a little depth and detail (but not too much!) by highlighting half of each crow – as if they were flying in the sun.

With my design complete, I was on to painting the final product.  I chose to use the Daphne Blue and Aged White as under-colors – as if the guitar had been painted and re-painted over its lifetime, with the green as the final color.  I then looked at my own old guitars to replicate patterns of wear, carefully sanding down the top layers to show the colors underneath.  Once I completed this, I then went on to may favorite part and drew and painted the crows.

With the basic finish complete, I finished with a few coats of a clear finish that I then also relic’d to add protection while still looking aged.

For a bit of fun, I capped it off by naming it the “Crowcaster” to incorporate the unique design with the original Telecaster model name.

And here is the final result!

Crowcaster full blog size.jpg
Crowcaster close blog size.jpg
Crowcatser headstock blog size.jpg

Enjoy!

-Jason

Making Kid's Room Murals Magical AND Long-Lasting!

I was recently talking with a real estate agent about painting kids’ room murals and she mentioned that while it was a great idea, it seemed difficult to justify the spend for something that would only last a couple of years!  This got me digging through some old photos, as well as taking some updated shots…

Mia’s Mural in progress in 2003 (with Mia’s Mom and Mia on the way!)

Mia’s Mural in progress in 2003 (with Mia’s Mom and Mia on the way!)

Mia (now 16), her Mom and the mural in 2020

Mia (now 16), her Mom and the mural in 2020

The rest of Mia’s mural

The rest of Mia’s mural

Mia, a good book and her Mallard

Mia, a good book and her Mallard

Beck (4) and Mia (6) with Beck’s undersea mural in 2009

Beck (4) and Mia (6) with Beck’s undersea mural in 2009

Beck (14) and Mia (16) with Beck’s mural in 2020

Beck (14) and Mia (16) with Beck’s mural in 2020

Beck on the move and his turtle in 2009

Beck on the move and his turtle in 2009

Beck and his turtle today

Beck and his turtle today

The murals in the pictures above have been loved for over 16 years (Mia’s sky mural) and over 10 years (Beck’s undersea mural).

When considering a mural for kids’ rooms, there are two main questions:

1) What is the value of doing a mural in the first place? - and

2) How do you make it last (like these did!)?

To answer question #1, I decided to ask Mia and Beck for their first-hand experience…

They shared that when they were little, they felt their room was “cool” and “special” and they loved bringing friends to show them the murals.  They always felt comfortable in their rooms and saw them as a “happy” space. Mia thought of the birds in her mural as actual birds, and used to saying goodnight to them every night, while Beck shared that he used to give the sea creatures in his room personalities. In addition to this alone time and time shared with friends, the murals also played role in the time they spent with each other - as one of their favorite games was to run back and forth between the rooms to “travel” from sky to undersea and back again!

Moving on to question #2 about making a mural last, Mia and Beck gave some good insight here as well.  Mia said she would never paint over her mural because it is part of her memories as a kid, but also because the meaning of the mural has become more and more important to her.  When the mural was painted, each bird stood for important people, including the crow, who stood for her grandfather and the finch who stood for her father’s best friend Randy.  Unfortunately, both her grandfather and Randy died before Mia was born – so Mia likes to look at the birds and think about the stories she has heard about these special people.

So – the key to making a mural that will be cherished AND will last?  Make it special!  Unlike wallpaper or stick-on decals, painting a mural offers the opportunity to customize the space you create for your children. With some thought and planning, your children can be excited and inspired by their happy space for many years to come.

As a staring point in this planning process, following is a link to a list of 5 things to consider that I first published back in 2015: https://www.blackbeakstudios.com/blog/2015/8/3/5-things-to-consider-when-planning-a-kids-room-mural

Most importantly, bring your love and personality to the project and both you and your kids are bound to enjoy it while you watch them grow up (way too fast).

Enjoy!

Jason

Ombre Painting Spices Up Office Renovation

I often get to collaborate with clients and with designers, but I recently had the opportunity to also work with another decorative painter – which was a lot of fun!

As part of a large office space renovation (the same office space I did the “sketch” murals for), the designer and the client decided that for a number of the accent walls throughout the space, they wanted them painted with an ombre finish.  The company’s color is orange – so the concept was to create a gradation in tones of orange to create an eye-catching but soft and pleasing look for several of the (very) large walls throughout the space.

The challenge was scheduling.  Due to the many moving pieces in this large renovation and the hard deadline for the business to move in – the deadline on the ombre walls was tight!  My friend Joan was called in as the decorative painter to get this work done, but because of the tight schedule, she called me in to help!

Since I usually work alone, it was a nice treat to work with a crew of people.  Joan has another painter on her team, Rich, who prepped the walls for us and painted stripes of 4 of the different shades of orange to give us a good base to work with for the ombre.  Joan and I then moved through with 8 (!) shades of orange to help create a soft blend.

To make things efficient with the many colors we were using, my job was to go through first on the bottoms of the walls, blending from the white at the bottom up to the 5th darkest color.  Joan then followed and blended from the top down to my darkest color.

Not only did this process do the trick in terms of meeting the deadline, we also hit the mark for the look the client wanted!  Each day the customer walked by drew another compliment – my favorite of which was that he wanted to hug the walls!

Following are some shots of the final result.  Enjoy!

ombre 1.jpg
ombre 2.jpg
ombre 3.jpg

Enjoy!

Jason

A Specialty Paint Finish for an Entertainment Cabinet

Sometimes my specialty paint finishes can help create a focal point for a room, where in other cases my job is to complement and/or “complete” a look that already exists in a space.  My recent project creating a specialty finish on an entertainment cabinet in Boston was a fun challenge for the latter scenario.

I was brought in to this project by an interior designer friend to help her clients “fix” a set of doors and drawers that they felt looked too much like a filing cabinet!  The entertainment center is in the primary living space of a condo in South Boston that had been recently renovated, and while the upper section includes a venetian plaster finish, the lower cabinets’ simple light gray paint didn’t work with the overall look.

Below are pictures of the cabinet before I started:

Tanna before 1.jpg
Tanna before 2.jpg

My first step was to collaborate with the designer and the client on a solution.  They knew they wanted something to pick up on the patterning of the venetian plaster, but using plaster on the drawers and door faces would not be a durable solution.  To address this, I suggested creating a similar patterning with paint and glaze that I could them polyurethane for great durability.  For colors, we looked at the wallpaper, the venetian plaster and the counter top and decided to shoot for a gray that pulled in all of these elements without being too matchy.  To accomplish this, we aimed to go darker than the top section but not as dark as the counter – all while keeping the grays in the same general family as the wallpaper.

As always, my first step was to create sample boards.  In this case, I did four different color combinations to give my clients plenty of options to choose just the right look.  When we met to review the options, there were a couple of close finalists, but we were able to pick and option they were happy with!

With this in hand, I was ready to move forward with creating the look on the cabinets.  Since I record all of my color and techniques for samples, I just needed to use the same formulas for the cabinets.  As always, I cleaned and sanded to make sure I got good adhesion with me new paint.  I panted my base layer, then created the patterning with a second color.  When this was dry, I finished it all off with 3 coats of acrylic poly to get a good, hard finish that won’t yellow.

When I returned to re0assemble the cabinets, my clients were thrilled to no longer have the “filing cabinet” look! Below are the “after” pictures.

Enjoy!

Jason

Tanna after 1.jpg
Tanna after 2.jpg

Murals Based on Historical Images for an Office Redesign

As I was in the midst of working on my most recent mural project, the designer walked by and commented that I seemed like “such a happy man”.  Truth is, she was right – I truly love working on murals!

This project was for an office redesign in Cambridge, MA.   To help make the space special, the facilities manager wanted the walls to include two hand-done custom murals based on historical images of the Cambridge area.  The tricky part was that they needed them done in just over 2 week

As always, I started the process by collaborating with my clients on the look they were going for.  The designer shared historical photos they liked and showed me the walls – one needing a 20’ mural and the other a 30’ mural!  Based on these initial conversations, I did a painting concept for one wall, but also included a sketch to show an alternate composition.  While they liked the painting, they were intrigued by the sketch – and wanted to know if I could do a mural that looked like a sketch, and if it would take me less time than the painting.  The answer to both was “yes”!  To do both murals as full painting, I would not have been able to meet the deadline, but with the new approach it was possible!

The only challenge was I then needed to figure out how to translate the look of pencil on paper to a 20’ and 30’ wall.  One of the key considerations was that I needed the line work to be much thicker than a pencil to work on the large scale.  I did some experimenting and landed on using pastels.  The pastels gave me the nice thick lines, and by using various shades of gray, I could also create depth by using lighter colors in the background.

My remaining challenge, however, was how to make sure my drawing wouldn’t just rub off the wall when I was done!  Again, after some experimentation, I discovered a multi-step process with acrylic polyurethane – using spray, gentle brushing and then rolling to create a completely durable finish in the end.

For the content of the murals, I started with photos of Craigie Bridge and Oak Square – making tweaks to fit the space.

In the end, I was able to give my client the look they wanted AND meet the deadline! … And I loved doing it.

Following are pictures of the final result.  Enjoy!

20’x9’ mural of Craigie Bridge

20’x9’ mural of Craigie Bridge

30’x9’ mural of Oak Park

30’x9’ mural of Oak Park

Oak Park mural

Oak Park mural

Oak park mural detail

Oak park mural detail

Oak Park mural detail

Oak Park mural detail

Decorative Paint Repairs To The Rescue!

While I love my creative projects, I also truly enjoy the challenge of my unique specialty painting repair projects!

One of my recent challenges was to fix a floor that had recently been refinished.  In the process of finishing the stairs, certain sections of the landing did not accept the stain and the floor was then polyurethaned – leaving spots that looked worn, but actually had a poly coat on top of them.  The best fix would be to re-sand the floor all the way down to bare wood and start over – BUT, the problem was that the flooring was actually plywood in this area, so it was not an option to sand it any further as it would have taken off the veneer!

Rather than ripping up the old floor and starting over, I was called in to work “magic”!

Since there was polyurethane over the worn spots, re-staining was not an option.  Instead, I used acrylic paints to tint polyurethane and put my tinted poly over the existing finish.  My favorite part of things like this is matching the color – so once I had a great match, I was on to carefully addressing the patches.

In doing this, the biggest challenge is overlap.  While you want the tinted poly over the worn areas, you DON’T want it to touch the existing stained areas – as that would just make those areas darker and create a dark outline around the fixed spot. This meant using my finest brushes in some areas, but also meant I needed to blend the edges in other areas – using everything from water to my fingers to make the blend seamless.

To get the depth of the color correct, I needed to let my poly dry and then do a second coat – following the same process as I did for the first coat.

Finally, I wanted to make sure the shininess of the finish was consistent – so when my second coat was dry, I re-poly’d the entire section.  The original floor had a matte finish, so I also used a matte poly – BUT, as it turned out, my matte poly was slightly shinier than what was originally used.   To address this, I waited for my poly to dry and I then rubbed it gently with super-fine steel wool to cut the sheen slightly.

 In the end, I got both the color and the sheen to match – and the client was thrilled to avoid the costs of replacing the floor!

 Below are some before and after pictures — 

Before

Before

After

After

Before

Before

After

After


Enjoy,

Jason

Faux Painted Horn Tiles on a Wayland, MA Ceiling!

For my decorative painting work, I do plenty of “traditional” faux finishes – but I love when get to create completely new faux paint designs!

This was the case with my recent project for my client Jodi.  Jodi wanted to do something dramatic and fun with the ceiling in her powder room, but at first she wasn’t sure exactly what to do.  When we met, she was thinking of doing a gold finish, but then she looked at her mirror and asked if we could do something that picked up on the look of the horn tiles that make up the frame of the mirror (see picture below).  My answer was an enthusiastic YES!

The inspiration

The inspiration

Since Jodi was going for drama and fun, I loved the idea of blowing up the look of the tiles and replicating it on the ceiling.  As I looked at the space, my one concern was that the look could lose some of the drama as it met the grey walls, so I recommended we do a white border to frame the tiles – and Jodi was immediately on board.

As always, my first step was to do a test board – showing a small version of the tiles on a 2’x2’ panel to make sure the look I envisioned was in line with what Jodi wanted. The “tiles” in the ceiling ended up being about 20”x20”, so I did a scale version with 10”x10” squares to give Jodi a good idea of how the abutting tiles would look.  When we met to look at the concept, Jodi said; “I love it!” – and I was on to the final project!

My first step on-site was to do all of my measurements to make sure I could make a consistently sized border and fit in 12 evenly sized square(ish) tiles.  To make this work, I laid out the border and then created a template for the squares (which needed to be slightly off square at 19.5”x19.75”) so I could make sure everything would fit.  I then taped the border and painted a base coat of a medium tan in the field where the tiles would go.

With the tiles drawn out and taped, I was then on to painting them!  Unlike many faux finishes – there was no specific technique to create this look.  Each square ended up being a mini-painting of a horn tile that I created by just blending paints like I would in a painting or mural.  As I worked my way around the ceiling, I mapped out different grain directions and colors to make sure the overall effect was balanced but dramatic.

Once this step was done, I finished it with a high-gloss coating to really make it pop!

 Enjoy,

Jason

The final ceiling!

The final ceiling!


Nursery Mural in Newton, MA

I love painting any kind of mural, but mural painting for kids’ rooms is rewarding in a special way - which was definitely the case with a recent nursery mural I painted in Newton.

 Dave and Sarah recently bought a new home and are expecting their first child in November!  As they looked at the grey walls of the nursery, Dave and Sarah knew they wanted something special for their baby.  Inspired by the three years they spent in England, Dave came up with the idea of transforming the room into an English countryside – complete with rolling fields and of course sheep!

The grey room before the mural

The grey room before the mural

To turn this vision into a reality, Dave and Sarah reached out to me.  As usual, my first step was to meet with them in the nursery so I could hear more about their vision for the mural and we could talk about the best wall(s) for the mural, colors, etc.  From this conversation, I learned that they wanted the effect of the mural to be soothing and not too bright or jarring.  They wanted sheep in the mural, but didn’t want them either too realistic or too cartoonish.  For the fields, Dave loved how different fields are different colors, and talked about rock walls. They also wanted the overall look to be fun and magical, but not too baby-ish.  I was thrilled as all of this is right up my alley!

I came to this meeting prepared with ideas for colors, so we were able to nail down the color scheme right away.  With all of this information in hand, I was off to create my concept painting.  As I always do, I painted a scale version of my concept using the actual paints I would use on the walls – so my clients can get an accurate idea of what the final result will be (see pictures below).

Concept painting for wall 1

Concept painting for wall 1

Concept painting for wall 2

Concept painting for wall 2

When the concept paintings were complete, I met back up with Dave and Sarah to get their thoughts.  We viewed the paintings in the nursery, and they loved them as they were. The one thing they wanted to add to the full-scale was fun small details that could be discovered (also right up my alley!).


With an approved design, I was on to painting the walls!  Because this was a larger space (the walls are 14 feet and 13 feet long), the process for this mural took me 2 weeks (2 very fun weeks!).  As I got closer to the end, I looped back with Dave and Sarah about fun details they would want, and they got back to me with ideas for including typical English birds and some poppies by the house.  They also wanted a chicken near the house.

How can you NOT have fun painting a 1” chicken (the smallest animal I have ever painted!) and a magpie on a sheep’s back?!

 When the mural was complete, it was great to share it with Dave and Sarah, who are thrilled with the result.  Dave even had a picture of my concept painting saved on his phone as his home screen image! 

I loved painting this mural – but even more, I love the idea of this mural helping to create a special place that will be enjoyed and cherished for many years to come

Enjoy,

Jason

The final mural - wall 1

The final mural - wall 1

The final mural - wall 2

The final mural - wall 2

House detail

House detail

Chicken with size reference (that is one small chicken!)

Chicken with size reference (that is one small chicken!)

Magpie-on-the-sheep’s-back detail

Magpie-on-the-sheep’s-back detail

Bird detail

Bird detail

And the European goldfinch

And the European goldfinch

Checkerboard Stained Floor in Boston

The work that I do goes by many different names – faux finishing, decorative painting, specialty painting, precision staining… OK, I just added that last one to most accurately describe the checkerboard floor I did in Boston!

I have done work on floors before, but this one taxed my math skills more than most.  Working with one of my interior design partners, the goal was to stain a diamond-shaped “checkerboard” pattern into the entryway floor of a condo that is being completely remodeled.  When we first met at the condo, the designer and I bounced around ideas using different sized diamonds and tried to roughly map things out to see what would look best.  Based on these conversations, we went with a 12” square diamond to get a full 3 shapes across the entry hall with enough room for a border on both sides.  To go with her design themes and create a bold impact with the floor, the designer chose to use a black stain.  As usual, my first step was to do a test board to show the designer and the client what the color would look like.

With the color approved, I began my thought process on how I was going to design this floor.  To do the loose planning step, I decided to cut a number of 12” square templates from poster board.  Anticipating the need for some problem-solving, I also made sure to have all of my measuring and cutting tools at the ready!

Once I was on-site to start the job, the first step was to start laying out my templates to collaborate with the designer.  We knew we wanted the main entry hall to have the pattern centered with 3 diamonds across – so that step was easy.  From there, I focused on the distance from the front door to the end of the hall – which amazingly fit perfectly with full diamond shapes from one end to the other!

Knowing this, we let the rest of the pattern fall in line with the entry pattern, which we knew would end up with the side halls having a less symmetrical look.  With these “big” decisions made, I was on to the specifics of how to make this all happen.  The first challenge was that the hallway was not square.  The floorboards were straight to the right wall, but the left wall angled in about ¾ of an inch from the door to the far corner.  Since the pattern needed to be aligned, we chose to use the floorboards as our guide. Aligning with the floorboards meant the left side border would get gradually smaller - so we decided to use a thin border that would abut the diamonds and leave between 2 and 2 3/4 inches between the wall and the border.

The next decision was how to handle the doorways, which were recessed from the walls.  To make the final design as clean as possible, we decided to treat these transitions as if the design was a rug – resulting in sharp, straight ends to the pattern.

Phew – now with all the decisions made, I was on to actually mapping it all out!  The fist step here was to draw everything out in pencil.  Below are some “before” pictures of the floor – but if you look closely, you can see my pencil lines.  To do this, I first measured the center line of the entry hall (again, using the floor boards to determine “center”) and drew out the middle row of diamonds from the front door to the back wall.  This then became my guide for everything else – as I measured and drew all other diamonds to create a consistent pattern out from this center row.

checker before 1.jpg
checker before 2.jpg
checker before 3.jpg

With the pattern drawn, I was on to taping everything off in order to create sharp lines with the stain.  While doing this, it was important to constantly recalibrate what was going to be black and what was going to be “white”!  The taping itself needed to be very sharp and precise, so I used some specialty blades and a LOT of patience.  You can see the tape mapped out here. 

checker during 1.jpg

Before I started staining, I also marked the “white” diamond with an additional tape line to make absolutely certain I didn’t put any stain in the wrong places! You can see that in this shot.

checker during 2.jpg

With this done, now I was on to the staining!  I am always very cautious to avoid any drips, but with black stain on a light floor, this was absolutely essential.  I put my stain can in a larger bucket and put all of it on a tripled-up drop cloth that I pulled right up to the edge of what I was staining.  I also made a conscious effort to stop before I stained each shape to make sure I was staining the right thing.  I am thrilled to report that not a single drop of stain was out of place!!

As I always do, I started my staining in the least conspicuous spot and pulled up the tape to make sure my prep all worked correctly before moving on.  Once I determined that the plan all worked (!), I was on to staining the rest of the 52 diamonds!!

The best part was when the designer and contractor came and were absolutely enthusiastic about the result.  Patience and math paid off.

Here are shote of the final result (before the floor is polyurethaned). Enjoy!

Jason

Looking in from the front door

Looking in from the front door

From the back wall looking back toward the front door

From the back wall looking back toward the front door

Looking in the one side hall through to the other side

Looking in the one side hall through to the other side

Corner detail at the edge of the entry hall to the side hall

Corner detail at the edge of the entry hall to the side hall

Bamboo Bathroom Mural

Sometimes my mural clients have a specific idea of what they would like me to paint – but other times coming up with the idea is all part of the mural creation process!

This was the case with my recent client Lauren in Providence.  She was re-doing her bathroom and she knew she wanted something special on the walls to give it a soothing, outdoors feel.  Lauren liked the very light (almost white), grayish/greenish color that was already on the walls and the ceiling, and she wanted my mural to go with this color as well as the light tile floors, the driftwood color on the vanity and the cool grey/green around the mirror.

Beyond this, I had a clean slate!  As we tossed around ideas, the first thing we pinned down was that the mural design should be relatively simple and clean, without too much detail or overwhelming color.  Lauren also has a green thumb and she had plants in the room, giving the space a warm, tropical, oasis-like feel.  Working with this, I suggested the bamboo forest idea – keeping the design simple and using just cool, soothing greens that tied in with the plants and the mirror.  Bringing the bamboo leaves up on to the ceiling would also help enhance the “outdoor” feeling.  Lauren liked the idea and I was on to the design stage!

As always, I did a scale painting of the mural design and sent it to Lauren for approval.  She liked it exactly as I designed it – so I was on to painting the final piece!  I used Benjamin Moore’s Aura Bath and Spa paint to make sure it would hold up to the moisture of the bathroom, in colors “Woodland Green” and “Herb Bouquet”.  See the final result below.

 Lauren is thrilled to have this special touch to her “oasis” bathroom!

Enjoy,

Jason


Bamboo bath final web.jpg

Painting a Mural of a Purple Pineapple

One of the things that is most enjoyable about mural painting is the diversity of things I get to create!   A great example of this is a recent mural I did of a purple pineapple on an oven backsplash for clients who are renovating their kitchen. 

Upping the difficulty level, the pineapple was replacing a previous mural and was painted on granite!  The up-side of granite is that paint does not stick well, so removing the old mural just required soapy water and a little bit of elbow grease.  The down-side, of course, is the fact that paint doesn’t stick well to granite – which also applied to my new mural!

The first step to address adhesion was to make sure I had the granite clean of all dirt and grease.  With this addressed, my next step was to paint a base coat in the shape of the pineapple using a special bonding primer (I like to use a product called Stix) that sticks to just about anything – thankfully including granite. 

The next challenge was doing the drawing on granite.  When I do murals, I create a concept drawing and/or painting in advance to make sure my design matches up with what my client wants.  Once I have approval on the concept, I photograph it and then project this image on the final surface so my mural exactly matches what the client wants and has approved.  In this case, though, I discovered that you can’t see an image projected on dark granite!!

My solution here was to tape up a large sheet of poster-board and project the image at the final size on to the board.  I could then map the outline of the pineapple on the board and cut out a template I could use as a stencil to lay down the primer.  This worked perfectly! Once I had the shape of the pineapple painted in primer, I could then draw in the details on the dried primer coat to get ready for the final painting. Below is a picture of the primer stage.

soutboro pineapple primer.jpg

With all of this done – I was on to the fun part of painting the pineapple!  Since the mural is just the pineapple, I decided to maximize the impact by doing a realistic and detailed painting using acrylic paints.

 And here is the purple pineapple on granite! 

Southboro pineapple blog size.jpg

Enjoy!

Jason

Faux Metal Finish Makes Fireplace go from Plain to Pop!

My recent clients Sara and Larry have just moved into a brand-new home and are now in the process of adding some of their own character to the space.  As part of this effort, they called me to transform their fireplace surround from plain painted drywall into a centerpiece that looks like it was hammered from one giant sheet of metal.

As always, I started the process by meeting at the house to look at the space and discuss Sara and Larry’s goals.The fireplace is a gas unit with a large surround and has the television mounted above it.Even with the fireplace and TV, there is still a good amount of surface to show off the metal finish! (see picture below). After meeting, Sara also sent me inspiration images of metal to give a good sense of the look they envisioned.

Before faux painting…

Before faux painting…

With this information in hand, I was on to painting a test board.  This is a standard part of my process – where I create the finish I am proposing on a 2’x2’ board to give my clients an opportunity to see it in their space before I start on the actual walls.  At first, the board appeared to be a fit for what they wanted, but after seeing it in many different lighting situations through the daytime and nighttime (lighting makes a huge difference in metallic finishes!!), we decided to make some revisions.  I addressed the additional input on a second board, which fit perfectly with what they were looking for.

Now that we had the perfect faux metal finish determined, I was on to creating the same look across the face and sides of fireplace surround.  To create the textured and slightly aged look, I used 3 different colors applied with translucency in some areas and opacity in others to get some variation. To build on this variation and accentuate the metal look, I also used a tool typically used for plaster application to get some areas that had a machined look.  While doing this, I paid special attention to vary any patterns I was creating and to make sure patterns continued from the sides to front to look like it was one piece of metal wrapped around to make the wall surfaces.

The final result was exactly what Sara and Larry had in mind, and definitely transformed the surround into the centerpiece they wanted!

The final result!

The final result!

Close-up to show texture and metallic reflections

Close-up to show texture and metallic reflections

Showing a bit more of the room…

Showing a bit more of the room…

Enjoy!

Jason

Painting a Restaurant Motto on Brick

Sometimes a high degree of difficulty can make my mural painting more fun – which was the case with a motto I recently painted on the brick wall of a Boston restaurant!

Given the different types of work I do, it might seem like painting a motto would not fall in the high difficulty category – particularly given the fact that I was supplied with the quote design, font, etc. that I just needed to match.  This would be true – except for the variable of the brick wall on which the motto was painted!  Think of trying to create many accurate, smooth lines on a wildly un-smooth surface.  First is the challenge of creating a consistent line from the relatively smooth surface of the bricks to the seams at the edge of the bricks to the very rough surface of the mortar in between the bricks.  Beyond this, however, was the challenge of the inconsistency of the bricks themselves.   This is an old Boston building, which means it is a very old brick wall – with all of the diviots, cracks, holes and chunks in the bricks that come along with the age. Some of the recesses were as much as an inch deep!

After drawing out the letters, I addressed this challenge by drawing the lines of the letters into all of the 3 dimensions of the cracks in a way that would look straight in 2 dimensions – which required a lot of standing back and scrutinizing.  With this done – I was on to painting, which I did in 2 coats to get good even coverage.  To address the roughness, I found that using my tiny, thin brushes worked best – painting every edge of each letter as if it was itself a smooth 1/16” thick line.  With the edges addressed, I then just needed to push my brushes into the crags to make sure that the black covered all of the area of the letters. Working with my client, we also chose a high-gloss paint to really make the lettering stand out.

In the end, everything came together – and the quote looks like it has always been on that wall! Following is a picture of the motto, plus a couple of close-ups to show detail of the craggy surface.

 Enjoy,

Jason

Sawtelle Bolocco motto Web.jpg
Boloco close up web.jpg
boloco close up 2 web.jpg

Master Bedroom Mural in Brookline

Of the (many) enjoyable parts of painting murals – one of my favorites is the “custom” part!  This was the case with my recent project of doing an 18-foot wide full-wall mural for a master bedroom in Brookline, MA.

 My clients Sheri and Michael liked the aesthetic of my mural work and wanted me to incorporate this with a winter landscape at sunset.  They wanted the color scheme to be a soothing palette of greys and blues to go with the light grey/blue they painted the walls – but they wanted a splash of color created by the sunset to give the piece some “pop” in the room.  They had some photographs they liked to give me a general feel – but they left it up to me to create the final design.

 With this in mind, I was off to create my concept painting.  I first used the base color – Benjamin Moore “Silvery Moon” to choose similar colors to create subtle, quiet transitions and blends for the background and foreground.  For the sunset, I wanted to create the “pop” my clients were looking for, but I also wanted to choose a color that was not too bright/saturated or dark to help it work with the rest of the composition. For this, I settled on”Del Ray Peach”.

For the design, I liked the idea of putting the viewer IN the scene as opposed to looking out at it, so I chose to bring the trees right up to the foreground in “into” the bedroom.As always, I did the concept painting to scale and used the actual paint I proposed to use for the mural to give an accurate look at what the final product would be.With this in hand, I met with Sheri and Michael who were happy with the design (photo below)– so I was on to the mural painting

8”x18” concept painting

8”x18” concept painting

Since this mural has so much blending of colors for soft transitions in the sky and the “fog” in the distant mountains and trees – I did all of this first.  Painting the background before I did the trees allowed me to focus on getting consistent, soft blends without worrying about the edges of the trees.  With the background done, I then drew the trees over the top of this and moved on to painting first the darker, more distant trees and then finally the birches up front.

The final result gave us the drama, but also the quiet beauty we were looking for!

Here are some shots of the progress – leading up to the final result.

Enjoy!

Jason

The blank wall before I started…

The blank wall before I started…

Step 1 - starting the background blends

Step 1 - starting the background blends

Step 2 - more background blends

Step 2 - more background blends

Step 3 - starting the trees

Step 3 - starting the trees

The final result!

The final result!

Finished mural from the other angle

Finished mural from the other angle

Close-up

Close-up

Faux Painting Color Match Challenge

As part of my specialty painting services, I often do paint “repairs” where I have to match everything from marble to wood to stone.  For these repairs, I also sometimes need to match existing faux finishes – which can be particularly tricky… Which was definitely the case with a recent project!

 A contractor partner called me to help with a project rehabbing a finished basement after repairs were done to fix water damage.  The challenge was that all of the basement was previously painted in a faux finish with mural vines painted over it. In this case, the walls were originally painted one solid base color, and then a glaze with a second color was applied in a pattern over the top of it. What makes matching a faux finish tricky is that you can’t actually see either of the colors that make up that finish because the glaze is semi-transparent.  This means that you can only see the base color through the translucency of the second color.

 Fortunately, in this case sections of the wall had to be removed due to the water damage – which meant that I was able to bring samples of the existing faux finish into my studio.  This was fantastic, because these colors were particularly challenging and required some trial and error to get a good match!  I did get a sample I was happy with though, and both the contractor and homeowner were happy with what I came up with.

 From there, I was on to the walls – but the challenge wasn’t over!  After priming, painting and glazing – I then had the pattern to deal with.  When applying a glaze, you can’t get it on the old section, because it will just make the overlap extremely dark.  This means I had to stop my pattern along a sharp line and then blend the new pattern into the old using a whole different set of colors that match the look of the translucent combination of the original 2 colors!

 After I got everything blended, I was on to the mural vines.  Here I figured out that the original vines were painted with fine art oil paints - so I did the same, matching the colors on-site.  For the vines, the color match was pretty straightforward, so I could concentrate on matching the style and patterning of the original vines to make it all seamless!

 In the end, it was all worth it when the client said of my match “I never even dreamed this would be possible!”

 Here are before and after shots of the different sections I needed to address:

Enjoy!

Hallway before

Hallway before

Hallway after!

Hallway after!

Soffit before

Soffit before

Soffit after

Soffit after

Ceiling before

Ceiling before

ceiling after.jpg

Faux Wood Painting Saves the Day

I recently was talking to a contractor friend about some of my projects and he said: “Sounds like you have to be really good at matching colors?!” I thought about this when I got a call from another contractor about painting a door and trim with faux wood grain to match the surrounding trim!

The contractor had installed a new sliding glass door - which looked great – but unfortunately when they stained it, it turned out too dark.  All of the trim in the house was a light, slightly orange/yellow wood tone- but the new door and trim turned a darkish brown.  The challenge of course is that once wood is stained, you can’t re-stain it to make it any lighter!

Paint is really the only way to make dark wood light again… BUT, the client still wanted it to look like the surrounding wood trim. To solve this problem I painted the door in a 2-step process and created a faux wood grain that ended up looking like it had been stained the same color as all the other trim all along!

Before I started on-sight, I got a shelf from the house that was the color I needed to match.  With this in hand, I worked in my studio to figure out how to mix colors to look just like this sample.  The first color I needed to figure out was the lightest color you see when looking at the wood (in this case a yellowy tan)– which becomes the base color.  This I was able to match by mixing just 2 colors.  Then I needed to figure out colors for the wood grain, which is slightly darker and in this case more orange/brown.  This I was able to mix with 3 colors.  I then did a test board painting it first with the base color and then creating the wood grain with a glaze of the second color.  I showed this test to the contractor, who was happy with the match – so I was on to the live project!

Once at the client’s home, I needed to prep and prime the door to cover the dark brown, and then I was on to painting everything with my mixed base color.  At this point, all of the door trim was just a plain, flat yellowy tan color.  With this complete, I was then on to the “magic” of the process – creating faux wood grain with the second color.  I had just finished one side of the door when the client came home and was thrilled with the match!

After completing the other side of the door and letting everything dry, I finished all of the new wood finish off with a water-based polyurethane to protect my faux wood paint and to make sure the sheen of my work also matched all of the surrounding trim.

Usually, I work on things to make them stand out - but this project brought new meaning to the phrase ‘blending in with the woodwork’!!

Below are some before and after pictures showing this:

The door before, with darker brown stain

The door before, with darker brown stain

The door after!

The door after!

Close-up of the before

Close-up of the before

Close-up of the door after faux painting!

Close-up of the door after faux painting!

Day Care Center Mural in Medfield

I have definitely established in past blog posts how much I love painting murals.  The only thing that makes mural painting even better is painting them in public places for many people to enjoy – which was absolutely the case with a recent project I did for a day care center in Medfield! 

 The Medfield Children’s Center (MCC) has been around since 1982 (and was attended by my now 13 year-old son!) and has been operated out of a church – until now! MCC is almost done building a state-of-the-art facility just a short distance away from their old home.  As part of this new start, the director, Robin, pulled me in to help set the right tone in the entryway.

 A staple in the old facility was the “kindness tree” – a leafless construction paper tree on which leaves with kid’s pictures were taped to acknowledge acts of kindness.  To continue but update this tradition, Robin wanted my mural to include a new kindness tree inscribed with the statement “kindness grows here”. She also wanted a mural with the following quote: “Some kids are smarter than you.  Some kids have cooler clothes than you.  Some kids are better at sports than you.  It doesn’t matter!  You have your thing too.  Be the kid who can get along.  Be the kid who is happy for other people.  Be the kid who does the right thing.  Be the nice kid.”  This speaks volumes about Robin’s focus on kindness and is a perfect way to get the message out to students and parents as soon as they enter the building.

 After looking at floor plans for available space for murals – I suggested we put these 2 together in one big mural – which Robin was immediately on board with.  To round out the scene, Robin asked that I include a cardinal and a dragonfly – both of which have significance for her and her family.  With this information in hand – I was off to do my design concept.  Below is the design I presented – and Robin loved it! In designing the tree, I wanted to keep the branches low enough that the staff could reach all the branches with any kind of step stool, with several branches at child height.  The choice of purple for the dragonfly was to balance the colors already in the mural and make it stand out against the green grass – but as it turns out, purple is also Robin’s favorite color!

MCC kindness wall mural design.jpg

Now that I had approval on the design, it was just a matter of waiting for the space to be completed to the point that I could get in and paint the mural.  Once on-site, the wall that best suited the mural was actually a little longer than we had planned – BUT, this worked out great in terms of making the quote a little less crowded with the tree.

Below are pictures of the progress of the mural – leading up to the finished result.

The wall before i started

The wall before i started

Step 1

Step 1

Step 2

Step 2

Step 3

Step 3

The final result!

The final result!

Close-up of the cardinal

Close-up of the cardinal

Close-up of the dragonfly

Close-up of the dragonfly

The kindness tree!

The kindness tree!

The quote

The quote

I rarely go back and update old blog posts, but in this case it was warranted! Now that MCC’s new facility is open and school is in full-swing, I was able to go back and experience the mural now that the tree is in bloom with the kindness leaves. It was amazing to see the transformation and truly special to experience first-hand children putting up their leaves.

Enjoy!!

Jason

Final full wall.jpg
Tree final.jpg
MCC with infant.jpg