I recently finished a project for a client in Colorado that falls somewhere between large commissioned oil paintings and wall murals. A long-time interior design partner, Anne Mueller of Briar Design, is now working in both MA and Colorado – and she reached out when she encountered this unique need for one of her Colorado clients!
Anne’s clients Don and Diane are renovating their primary bedroom – and as part of this project, they had two ideas that brought Anne to me. One was for the barn door they are installing from the bedroom to the bathroom. To turn this from a large, plain door to a unique centerpiece, they asked that I do a 6’x3’ oil painting that they would then have mounted on the door! As the subject of this painting, they sent me pictures of the actual view from their home of the continental divide. The goal was to use this as inspiration, using a loose painting style.
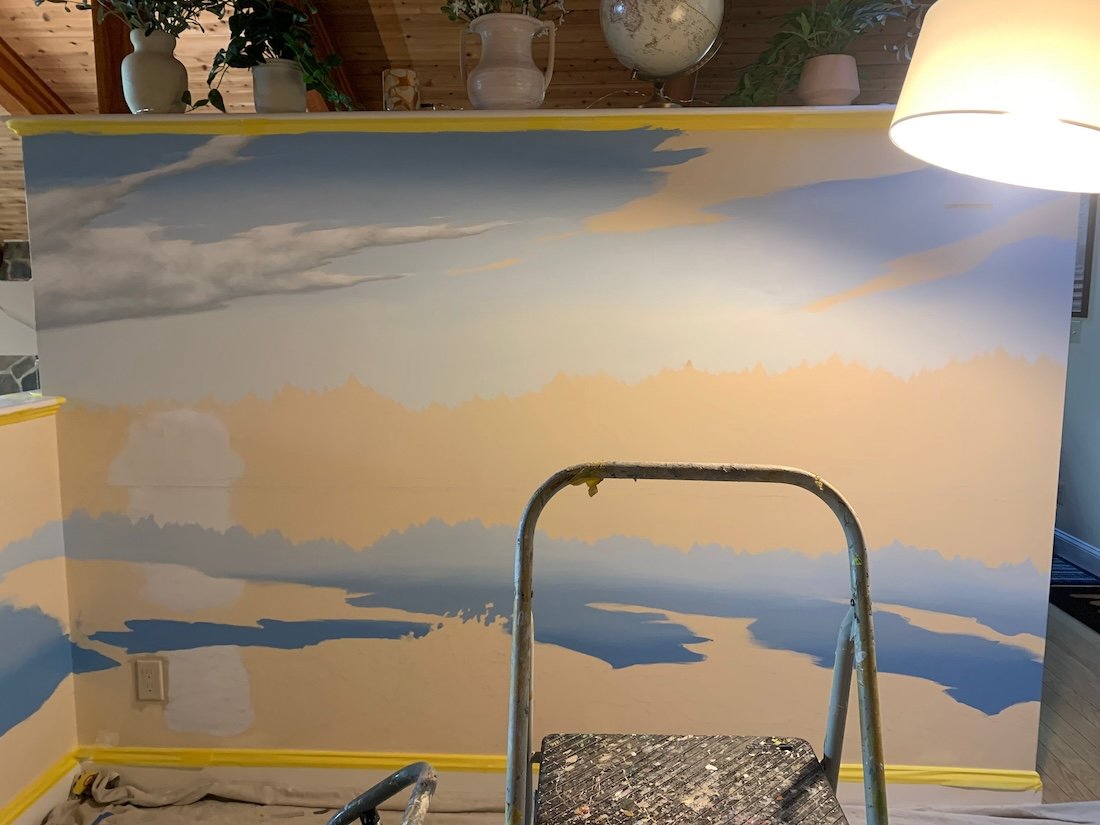
The second need was to block a large window up high in their vaulted ceiling that let in too much light. Rather than take the window out, they decided to hang a 6.5’x3’ painting – this time of the same view, but with the added drama of a sunset.
Below are photos of these paintings – both the pictures I took of the un-mounted canvases and also pictures showing them installed.
Enjoy!!
Jason

The 6 foot x3 foot oil painting
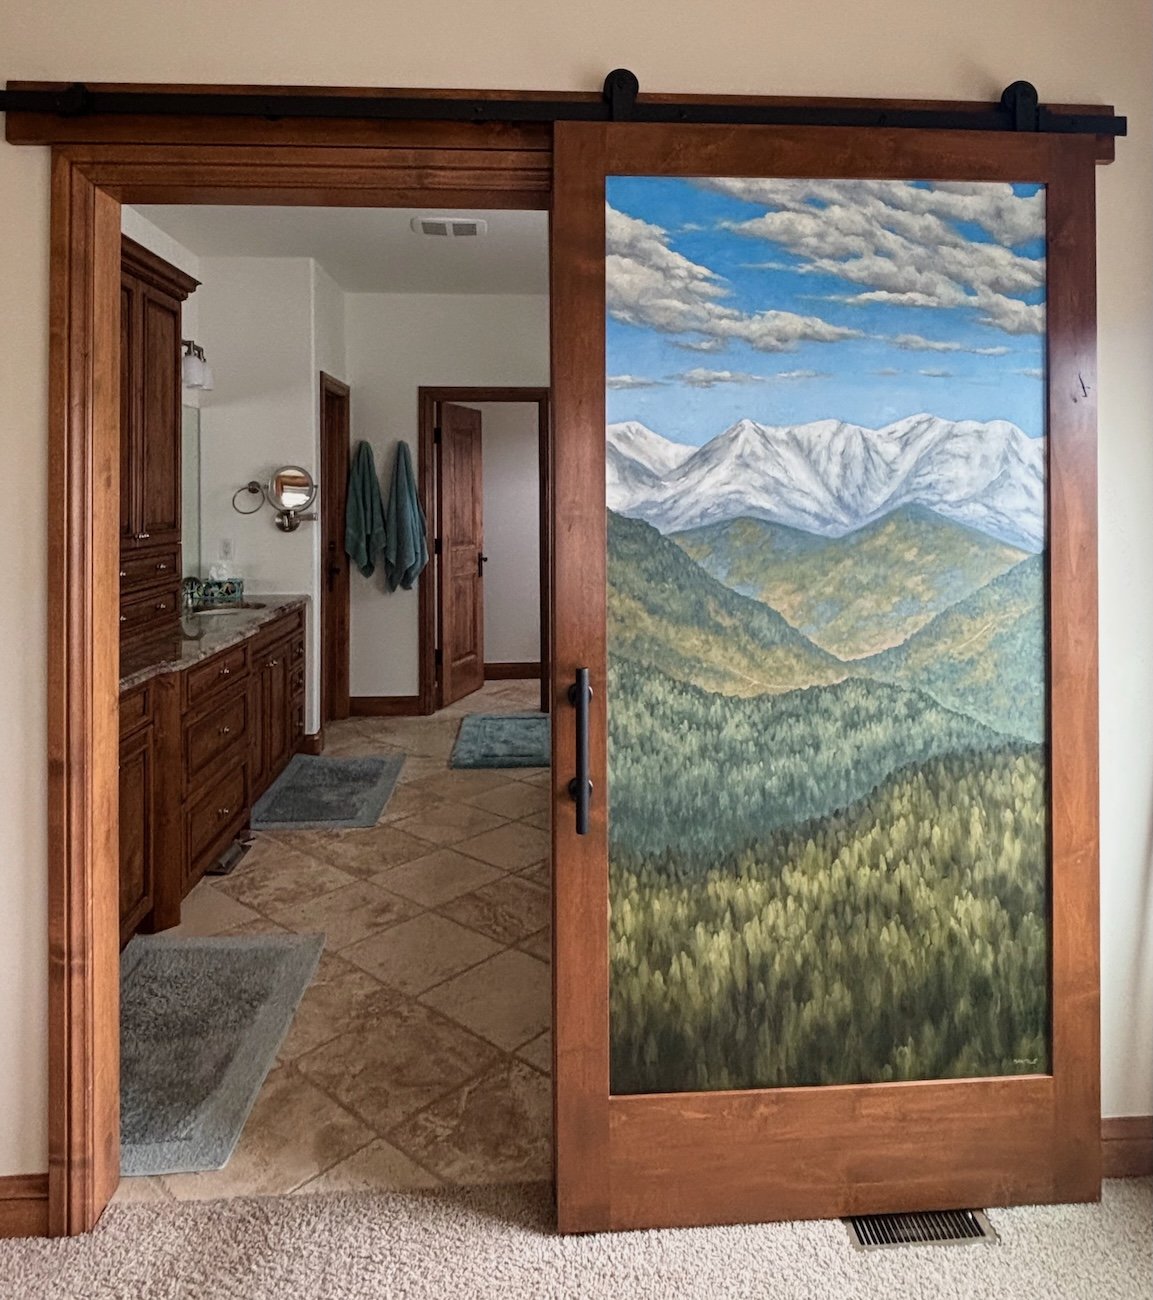
And it installed!

The 6.5 foot x 3 foot oil painting
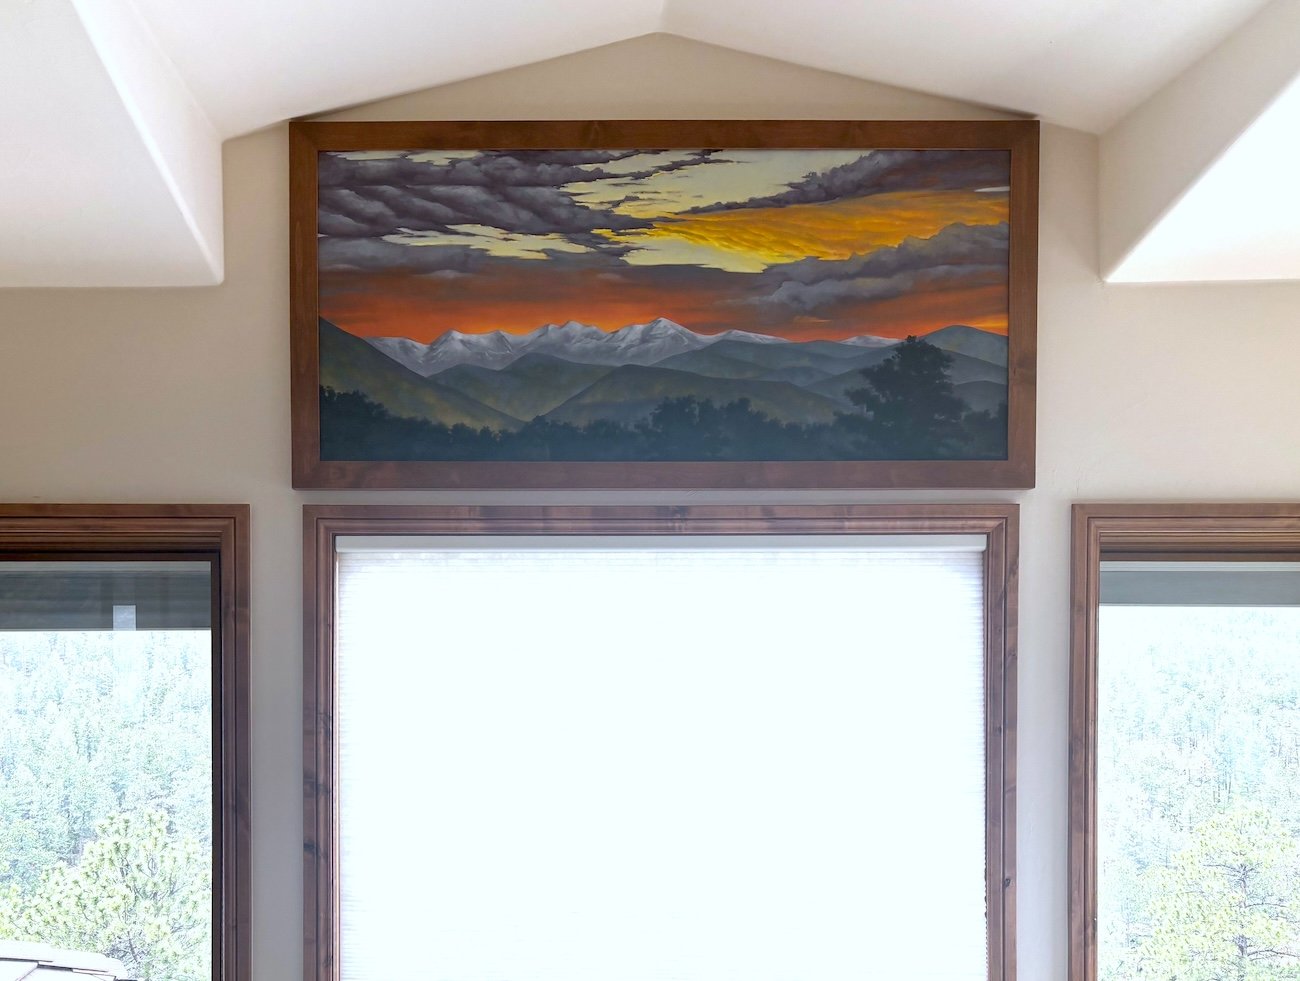
And it installed!